Introduction
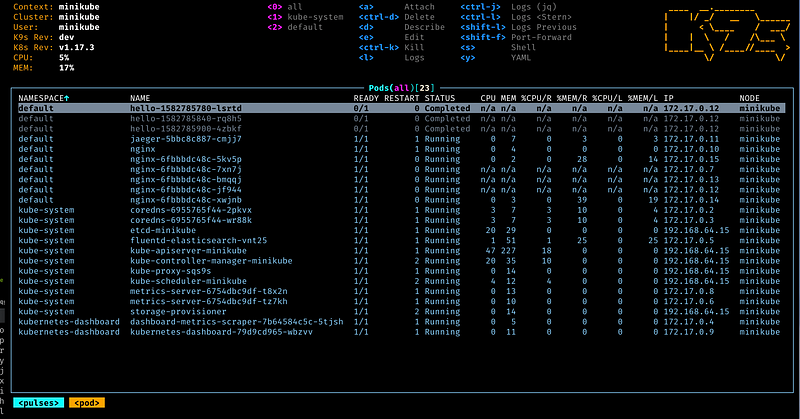
Managing Kubernetes clusters via the command line can be complex and time-consuming. K9s is an open-source, terminal-based UI that simplifies the Kubernetes experience, allowing engineers to interact with clusters more efficiently.
This guide covers everything from installing and configuring K9s to real-world advanced use cases, troubleshooting, and FAQs.
Why Use K9s?
K9s provides a more user-friendly and efficient way to manage Kubernetes clusters compared to kubectl. Here’s why it’s a game-changer:
- Real-time cluster monitoring
- Faster navigation through namespaces, pods, and resources
- Enhanced debugging capabilities
- Custom plugins for automation
Installing K9s
1. Install K9s on MacOS, Linux, or Windows
MacOS:
brew install derailed/k9s/k9sLinux:
curl -sS https://webinstall.dev/k9s | bashWindows (via Chocolatey):
choco install k9sGetting Started with K9s
1. Launch K9s:
k9sBy default, K9s connects to the current kubectl context and lists running pods.
2. Navigate Kubernetes Resources
- Press
:to open the command prompt inside K9s. - Type
deploymentsto view deployments. - Type
servicesto list services.
3. Switching Namespaces
:ns default  # Switch to the default namespace
:ns kube-system  # Switch to kube-system
Real-World Advanced K9s Use Cases
1. Troubleshooting Pod Issues
View logs of a failing pod
- Select a pod (
up/down arrow keysto navigate) - Press
l(lowercase L) to view logs - Use
/to search for error messages
Inspect pod details
- Select a pod and press
d - View container restarts, resource usage, and labels
2. Managing Deployments Efficiently
Scale a deployment
- Select the deployment
- Press
sand enter the desired replica count
Restart a deployment
- Select the deployment
- Press
rto restart
3. Customizing K9s with Plugins
K9s supports custom plugins for automation. Example: Add a shortcut to list all failed pods.
Create a plugin file:
mkdir -p ~/.k9s/plugin
cat <<EOF > ~/.k9s/plugin/failed-pods.yaml
plugin:
  command: kubectl get pods --all-namespaces --field-selector=status.phase!=Running
EOF
Now, run the plugin inside K9s:
:failed-pods4. Monitoring Cluster Resources in Real-Time
View CPU and Memory Usage
:top node  # View node resource utilization
:top pod  # View pod-level resource consumption
Inspect Network Policies
:netpol # Show applied Network Policies5. Applying Kubernetes YAML Directly from K9s
- Press
eon a resource to edit its YAML in real-time. - Apply changes and watch Kubernetes reflect them instantly.
Advanced K9s Commands and Shortcuts
:ctxView and switch Kubernetes contexts
:nodesShow all cluster nodes
:po -n kube-systemList pods in the kube-system namespace
sScale a deployment interactively
lView logs of a pod
rRestart a pod or deployment
Shift+DDelete a resource
FAQs
1. Can K9s work without kubectl installed?
No, K9s relies on kubectl under the hood.
2. How can I reset K9s configurations?
rm -rf ~/.k9s3. Does K9s support multiple Kubernetes clusters?
Yes, use :ctx to switch between clusters.
4. How can I update K9s?
MacOS:
brew upgrade k9sLinux:
curl -sS https://webinstall.dev/k9s | bash5. How do I create a custom view in K9s?
Modify the ~/.k9s/plugin/ directory with custom YAML configurations.
Conclusion
K9s is a powerful Kubernetes CLI tool that significantly improves cluster management and troubleshooting. By mastering K9s, DevOps engineers and SREs can work more efficiently and gain deeper insights into their Kubernetes environments.
Start using K9s today and take control of your Kubernetes clusters! 🚀
📢 Have questions or feedback? Drop a comment below or connect with me on Twitter/X@spysood!
Originally published on Medium.